3D PRINTING
Imagine. Model. Print.
A 3D modelling and 3D printing course for children aged 10–12. Children learn to create their own objects in Tinkercad and Blender, prepare models for 3D printing and turn a digital idea into a real object they can hold in their hands.
Tinkercad • Blender • 3D printing • Character Design
Key information
From the screen to a real object
On this course, your child goes through the whole process of creating their first 3D project.
First, they decide what they want to make, then create a model in Tinkercad or Blender, learn to prepare it for printing and watch their digital project become a real object.
We start with accessible, engaging projects: keyrings, phone stands, small decorative objects and simple characters.
We gradually explore the basics of Character Design and learn not just to download ready-made models, but to invent and create our own.
- 01Idea
- 023D model
- 03Preparation
- 043D printing
- 05Finished object
What your child will learn to do
Tinkercad
Create their first 3D models from simple shapes and understand the basics of working in three dimensions.
Blender
Explore a professional 3D modelling environment and create their first projects in Blender.
Character Design
Understand the basics of character design: silhouette, shape, proportions, personality and details.
Original objects
Create keyrings, phone stands, figurines, decorative objects and simple functional items.
Preparing for 3D printing
Understand why a good-looking model cannot simply be sent straight to the printer.
How 3D printing works
Learn about part thickness, dimensions, model orientation, overhangs and supports.
Finished project
Take an idea from a digital model to a physical object they can hold in their hands.
From a first keyring to an original character
Keyrings
Work with shapes, text and dimensions to create our first models for printing.
Phone stand
A first functional object. It is not just about coming up with a design — the object needs to work in practice too.
Decorative objects
Experiment with shape, volume and design.
Character Design
Invent our first original characters, working on silhouettes, proportions and distinctive details.
Independent project
Follow the journey from an idea and a digital model to a real printed object.
AI helps you imagine. You create.
AI can be used to find ideas and references, and as a starting point for a future model.
But your child still needs to decide:
- —What do I want to create?
- —What should it look like?
- —How can I build this shape in 3D?
- —Can it be printed?
Will it really print?
Learn to think not just like a designer, but like an engineer too.
A model can look great on screen but turn out to be too complex for 3D printing.
Children therefore gradually discover the real limitations of the technology:
Who will enjoy 3D Printing?
Start from scratch
No previous experience is needed.
We start with simple tools in Tinkercad and gradually move on to Blender.
Projects become more challenging as your child's skills develop.
From an idea to a real object
Our students' projects: from their first digital models to objects made on a 3D printer.
Who your child learns from
Work by Stas Nikonovich — a practising 3D artist and founder of Sculpture Studio Nikonovich S.
Click on a work to view it larger
Teacher
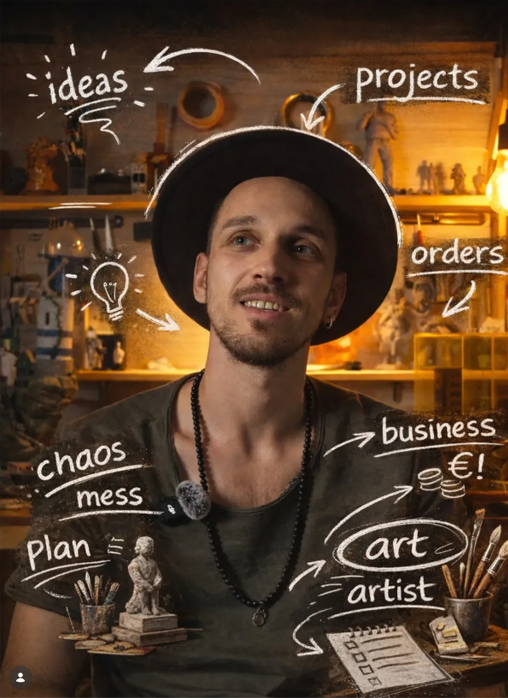
Stas Nikonovich
Children learn not from a theory teacher, but from a practising professional who creates 3D objects and sculptures: from digital modelling and printing to post-processing, painting and artistic detailing.
Stas shows how working on an object really works: how an idea takes shape, why a model needs to be prepared for printing, how to achieve a neat surface and how to use colour to bring a figure to life.
What comes next?
3D Printing can be the first step into the wider field of 3D Art & Design.
3D Printing
- ↳Tinkercad
- ↳Blender
- ↳3D printing
- ↳first independent projects
Art Workshop
- ↳Concept Art
- ↳Blender
- ↳complex 3D models
- ↳3D printing
- ↳model making
- ↳artistic finishing
- ↳project presentations
Portfolio
Not just individual class assignments, but a series of projects showing the student's skills and development.
- ↳3D Art
- ↳Game Art & Characters
- ↳Concept Art
- ↳Product Design
- ↳Architecture & Model Making
- ↳presenting their own projects
Bring work together into a portfolio for the next step.
Where could this path lead?
University
A portfolio for applications to courses in:
- ↳Architecture
- ↳3D / Game Art
- ↳Concept Art
- ↳Product & Digital Design
First freelance projects
First steps towards independent work:
- ↳3D models
- ↳Game assets
- ↳Models for 3D printing
- ↳Visualisation and scale models
Learning projects gradually become work students can show to a university or a potential client.
It all starts with the first project.In 3D Printing, children aged 10–12 learn the basics of modelling and printing. Professional portfolio preparation begins later, on RoboLab's programmes for older students.
Enjoy creating? This is just the beginning.
After the course, your child can choose which direction to pursue next.
Art Workshop
For those who want to combine Concept Art, advanced 3D modelling, 3D printing, hands-on work, artistic finishing and model making.
Coming soonBlender 3D & Animation
For those who want to explore 3D modelling, texturing and animation in greater depth.
Explore the courseWhat parents say
«My son really enjoys the course. Each child works independently on their own project, while the teacher offers individual help and advice. The atmosphere in class is very friendly. Sasha always looks forward to his lesson and comes home delighted.»
«My daughter has always loved drawing, and on this course she has also learnt to create 3D models. She thoroughly enjoys the lessons and proudly brings her work home. A huge thank you to the teacher for the support and inspiration!»
«I really like that the children do more than work on computers: they sculpt with clay, paint by hand and refine their models. And they create not just figurines, but useful things too — a phone stand, for example.»
From an idea to a real object
A first 3D project can start with a simple idea. Imagine. Model. Print.
3D Printing • 10–12 years • RoboLab Limassol